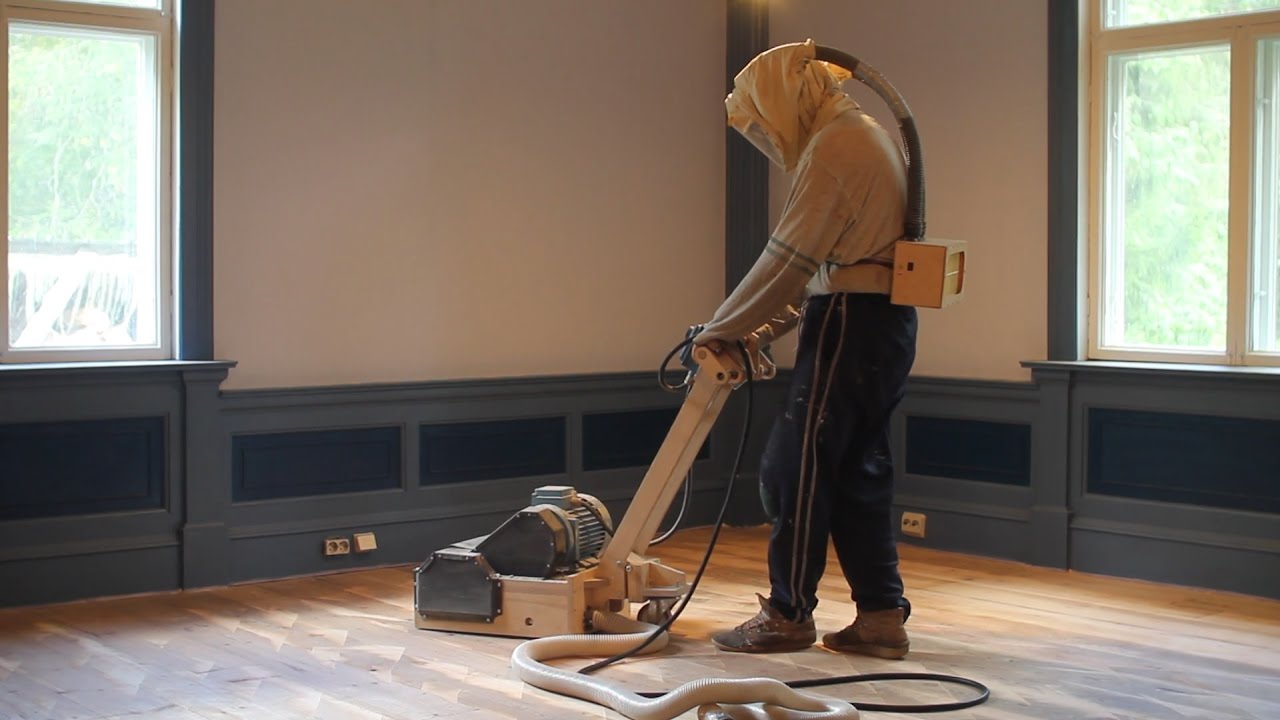
Step-by-Step Guide to DIY Floor Sanding for Homeowners
Wooden floors are timeless and elegant, adding warmth and character to any home. However, over time, they can lose their lustre due to wear and tear, scratches, and the accumulation of dirt and grime. If your hardwood floors are looking worse for wear, fear not!
With a bit of elbow grease and the right tools, you can breathe new life into your floors through the process of DIY floor sanding. Not only does this save you money compared to hiring professionals, but it also gives you the satisfaction of revitalising your home with your own hands.
In this guide, we’ll take you through each step of the Floor Sanding Geelong process, from preparation to finishing touches.
Preparing for Floor Sanding
Assessing the Condition of Your Floors
Before diving into the sanding process, it’s crucial to assess the condition of your floors. Inspect them for any damages, cracks, or unevenness.
If your floors have deep gouges or are severely warped, they may not be suitable for sanding, and you may need to consider other options, such as refinishing or replacement.
Gathering Tools and Materials
To embark on your DIY floor sanding journey, you’ll need a variety of tools and materials. Essential items include a drum or belt sander, sandpaper in various grits, a buffer or orbital sander for edges and corners, a vacuum cleaner, wood filler, and protective gear such as dust masks, safety goggles, and ear protection.
Clearing the Room
Before you begin sanding, it’s important to clear the room of all furniture, rugs, and other obstacles. This will give you ample space to work and prevent any accidental damage to your belongings.
Additionally, protect walls and baseboards by applying masking tape to avoid scratches and marks during the sanding process.

Safety Precautions
Protective Gear: Safety should always be a top priority when undertaking any DIY project, especially one involving power tools. Be sure to wear a dust mask to protect your lungs from airborne particles, safety goggles to shield your eyes from flying debris, and ear protection to dampen the noise of the sanding equipment. Choose clothing that covers your skin and sturdy footwear to protect your feet from falling objects.
Ventilation: Sanding generates a significant amount of dust, which can be harmful if inhaled in large quantities. To minimise dust accumulation and ensure good air quality, open windows and doors to allow for proper ventilation. You can also set up fans to help circulate the air and carry away airborne particles.
Sanding Process
Coarse Sanding (Initial Pass)
Begin the floor sanding Geelong process with coarse grit sandpaper on your drum or belt sander. Start in one corner of the room and work your way across the floor, sanding with the grain of the wood.
This initial pass will remove the old finish and any surface imperfections, such as scratches and dents, leaving behind a smooth, even surface.
Intermediate Sanding (Fine Sanding)
Once you’ve completed the coarse sanding stage, switch to finer grit sandpaper for the intermediate sanding phase.
Again, sand with the grain of the wood to avoid damaging the surface. This step will further refine the surface, removing any remaining scratches or marks left behind by the coarse sandpaper.
Final Sanding (Finest Grit)
For the final sanding stage, use the finest grit sandpaper available to achieve a glass-smooth finish.
Take your time and pay close attention to detail, ensuring that all imperfections have been eliminated and the surface is uniform in texture and appearance.
Cleaning Up
Removing Dust and Debris
Once you’ve finished sanding, it’s time to clean up the mess. Use a vacuum cleaner equipped with a dust bag or HEPA filter to remove dust and debris from the floor and surrounding areas. Pay special attention to corners and edges, where dust tends to accumulate.
Filling Cracks and Gaps
Inspect the floor for any visible cracks or gaps, and use wood filler to fill them in. Apply the filler with a putty knife, pressing it firmly into the gaps and smoothing it out to ensure a seamless finish. Allow the filler to dry completely before sanding it down to level with the surrounding surface.
Finishing Touches
Choosing a Finish
With the sanding complete and the floor cleaned up, it’s time to apply the finishing touches. Choose a finish that suits your preferences and lifestyle, whether it’s polyurethane for durability, varnish for a glossy sheen, or wax for a more natural look.
Consider factors such as ease of application, maintenance requirements, and the desired level of protection for your floors.
Applying the Finish
Follow the manufacturer’s instructions carefully when applying the finish to your floors. Use a brush, roller, or applicator pad to ensure even coverage, working in small sections at a time.
Apply multiple coats as needed, allowing each coat to dry completely before applying the next one. Be sure to ventilate the room well during the finishing process to allow for proper drying and curing.
Drying and Curing
After applying the final coat of finish, allow your floors ample time to dry and cure before walking on them or replacing furniture.
This can take anywhere from a few hours to several days, depending on the type of finish used and environmental conditions. Exercise patience and avoid rushing the process to ensure the best results.
Maintenance Tips
Congratulations on successfully sanding your floors! Now that you’ve invested time and effort into restoring the beauty of your hardwood floors, it’s essential to maintain them properly to ensure they retain their lustre for years to come. Here are some crucial maintenance tips to follow after floor sanding:
Wait for Proper Curing: Allow sufficient time for the finish to cure completely before placing furniture or rugs on the newly sanded floors. Typically, this may take anywhere from 24 to 48 hours, depending on the type of finish used and environmental conditions.
Use Protective Pads: Place felt pads under furniture legs to prevent scratches and dents when moving or rearranging furniture. These pads act as a buffer between the floor and furniture, reducing friction and impact.
Regular Cleaning Routine: Establish a regular cleaning routine to keep your floors looking their best. Sweep or vacuum the floors regularly to remove dirt, dust, and debris that can scratch the surface. Use a soft-bristled broom or a vacuum cleaner with a hardwood floor attachment to avoid scratching the finish.
Avoid Water Damage: While hardwood floors are durable, excessive moisture can cause damage over time. Clean up spills immediately using a dry cloth to prevent water from seeping into the wood and causing warping or staining. Avoid using wet mops or steam cleaners, as they can damage the finish and penetrate the wood.
Protect from Sunlight: Direct sunlight can cause hardwood floors to fade and discolour over time. Use curtains, blinds, or UV-protective films on windows to minimize exposure to sunlight, especially in areas with prolonged sun exposure.
Periodic Maintenance: Schedule periodic maintenance to keep your floors in top condition. This may include recoating or refinishing the floors every few years to refresh the finish and repair any minor scratches or imperfections.
Monitor Humidity Levels: Fluctuations in humidity can cause hardwood floors to expand and contract, leading to gaps or buckling. Use a humidifier during dry seasons to maintain optimal humidity levels and prevent potential damage to your floors.
Conclusion
So, there you have it! With a little prep work, some elbow grease, and this guide, you’re well on your way to beautifully restored Wood Floors. Remember, patience is key. Don’t rush the sanding process, and be meticulous with each step. The reward will be a stunning floor that adds warmth and character to your home for years to come.
If you’re still feeling unsure, consider practising in a small, inconspicuous area first. And if the DIY isn’t for you, there’s no shame in calling in a floor sanding Geelong professional.


